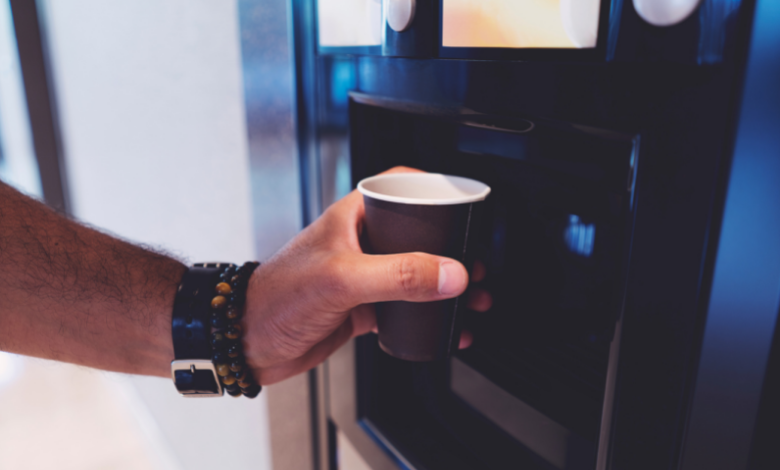
Home Improvement

DIY Process to Lay Vinyl Tile Flooring

If you are on the lookout for cost-effective and waterproof solutions to your old concrete floor, you might think that tile is the best option, particularly when you have damp spaces. But, it is good to make an informed decision. So, before you decide on spending big bucks on flooring options like tiles, hardwood, and carpet, take some time to think again. Here you have a better alternative to concrete flooring, a flooring option that will not break your bank. Consider installing luxury vinyl tile.

Steps to Take While Installing luxury Vinyl Tile

Think about having vinyl tiles if you are looking for a pocket-friendly and quickest way to remodel your house flooring in Brampton. It could be the best option for your house flooring. Vinyl floor tiles Brampton come in arrays of sizes and patterns. Also, they are water-resistant and easy to clean. Vinyl tiles can make all the nook and crannies in your house look attractive; may it be your bathroom, kitchen, laundry room, and any other.

Here you will learn the proper steps of installing luxury vinyl tiles. It would be best to have the right skills and appropriate tools to handle this project with ease and complete it in a couple of days.

  1. Peel and stick self-adhesive vinyl tiles
  2. Adhesive tiles

These are the 2 types of vinyl tiles. We will be here focusing on the vinyl tiles that are installed with adhesive.

Stages installing vinyl tile flooring

Follow these crucial stages while installing new vinyl tile flooring.

installing-vinyl-tile-flooring

Stage One: Organize the surface

Vinyl tiles are compatible with ceramic, concrete, as well as your existing vinyl flooring. The tiles can only stick to the adhesive if the surface has a level and is clean. If your house has ceramic flooring, remove the tiles before laying the vinyl. For concrete flooring, the cracks are to be considered. Fix them with concrete filler. Inspect the floor for any high or low spots with the help of a carpenter’s leveler. Grind down the high spots by using a belt sander. If you have a sloppy floor, you can use a self-leveling concrete compound.

If you already have vinyl flooring, ensure that the floor is leveled adequately before beginning your cheap vinyl flooring installation project. On uneven flooring, the new vinyl will adopt the same uneven rough texture as your existing flooring. You can fix any dents or roughness on your old vinyl flooring by using the embossing leveler.

If your existing vinyl flooring is extremely old or damaged, you will need to remove the entire floor since it is not worth leveling a floor that is already damaged or decades old. Plywood underlayment is also an excellent idea to build over the old flooring. The underlayment can provide you with a flat and stable surface for installing luxury vinyl tile.

Stage Two: Take away the baseboard and trim the door jambs

Removing the baseboard and the shoe trim will give your house a cleaner look. Clear out the paint amid the wall and baseboard with the help of a putty knife, and a pry bar can be used to pry the trim. You can reuse the baseboard. However, if you are planning to do so, remove each piece of the baseboard carefully.

Laying tiles underneath the door jambs can be difficult and might not give you the perfect look you might have expected. Cut the door trim so you can, with ease, push the vinyl tiles under the door. Take a piece of tile or underlayment and measure how many trims you will need for the vinyl flooring to fit under the door comfortably. Once you evaluate the trim size, take an appropriate saw and cut the trim.

Stage Three: Make reference lines

A well-planned layout ensures that your new vinyl tiles are placed in a visually pleasing and structurally sound pattern. Besides, having a precise layout will help you move more quickly since you will know how to arrange the tiles. Create two reference lines. These lines will guide you in installing the vinyl tiles. For the reference lines, you can use a laser leveler or a simple chalk marker. Take a measuring tape, measure the wall of your house and mark the center.

In the same way, mark the center of the opposite wall. Pull a line stout towards the center mark on the opposite wall; and create a line. Next, draw another line parallel to the first one. Both lines will intersect at the center and divide the room into sections.

Do a trial-fit applying adhesive. First, lay the tiles along a straight line and then across the surface. Now see how your new vinyl tiles fit together and what things you might need before handling the permanent installation process.

Stage Four: Apply the vinyl flooring adhesive

Spread the adhesive evenly over the floor with a notched trowel. Make the process easier by applying the adhesive from one corner of the room and work your way across the room in sections. Next, clean out the adhesive ridges with the notched trowel tip. See if you can see the subfloor under the adhesive in the spaces amid ridges.

Before laying the vinyl tiles, look if one section of the floor is dry. The wet adhesive is likely to cause air bubbles and can also damage your flooring. However, wait for the portion to dry before installing the tiles. Each product of vinyl adhesives is different, and each type will take a unique drying time. The drying time hugely depends on the humidity and temperature. To check if the adhesive is dried, press it with your finger. You will feel the floor sticky, but the adhesive should not stick on to your finger. Besides, the color of dry vinyl adhesive will get lighter.

Stage Five: Set the vinyl tiles

The ideal and the most effective way of installing vinyl tiles is to start right from the room’s edge. Be attentive to the chalk lines to ensure that the tiles are installed in a straight line. The very first piece of tile you lay is crucial since it will set the tone of all subsequent tile installations. Each tile is to be installed flat adjacent to the previous one. Do not slide the tiles into place. It will only drag the adhesive and make the result downright messy. If you have different obstacles like corners or pipes to fit the tiles around, trace the pattern on cardboard. Then, paste it to the tile with the help of a contour gauge. Once done, cut the pattern with a utility knife.

Stage Six: Press down the flooring

Once you have laid a few tiles, press the flooring with a floor roller to bond the adhesive to the subfloor. Next, firmly but with some pressure, push the roller across the flooring. Then clean excess adhesive between the vinyl tiles with a tiling sponge.

Stage Seven: Carefully keep on covering the entire floor with vinyl tiles

Spread the vinyl flooring adhesive, lay the tiles, and push the floor with a roller! Keep repeating this process until the entire floor is covered in vinyl tiles. After completing the tile installation process, you might need to cut a few tiles to fit around the perimeter.

Stage Eight: Let the floor dry completely

Based on the adhesive you have used, your floor might take a couple of hours to dry completely. It is crucial to keep the room closed during this time, and you should not walk into that room. Next, restore the baseboard and shoe trim once the vinyl tile flooring is dried.

Apply silicone caulk around the walls if you install the vinyl tiles in moisture-prone spaces, like your bathroom. It will prevent damages to the tiles.

Additional Pro Tips

Here are some pro tips that can make your vinyl tile flooring process even more successful.

  • Figure out the number of vinyl tile cartons you might need, so you have enough tiles ready by your side once you start the project. Calculate the area of your room in square meters and divide the number by the square measurement of the tiles.
  • Vinyl tiles can be textured, but not all. However, if you are looking for a similar look to porcelain or ceramic, opt for the groutable vinyl flooring Brampton. Vinyl tiles are available in various patterns, thicknesses, and colors. However, use these variations while selecting the right tile for your flooring.
  • While kneeling the newly installed vinyl tiles, put a piece of timber amid the floor and your knees. The timber will prevent the tiles from sliding out.
  • Get the tiles delivered to your address and keep them for a minimum of 48 hours in the room to let them acclimatize.
  • Mix the vinyl tiles from different cartons. This way, you will ensure that your floor has a variety of patterns.

Opt for vinyl tile flooring and change any space of your house

Vinyl tiles are the most innovative and pocket-friendly options to invest in. Besides, vinyl tiles can provide you with gentler and more natural floor options than other tiles. Fortunately, you don’t need to hire an expert, but if you don’t have the required skills and knowledge about vinyl tile installation, opt for professional vinyl flooring Brampton. Having the right help, you can install an utterly beautiful new floor in a matter of hours.

Related Articles

Back to top button